KVM 全称为 Kernel-based Virtual Machine。
环境准备
| 主机名 | IP 地址 | 内存大小 |
|---|---|---|
| kvm01 | 10.0.1.11 | 4G |
| kvm02 | 10.0.1.12 | 2G |
1、在两台主机开启 vt 虚拟化: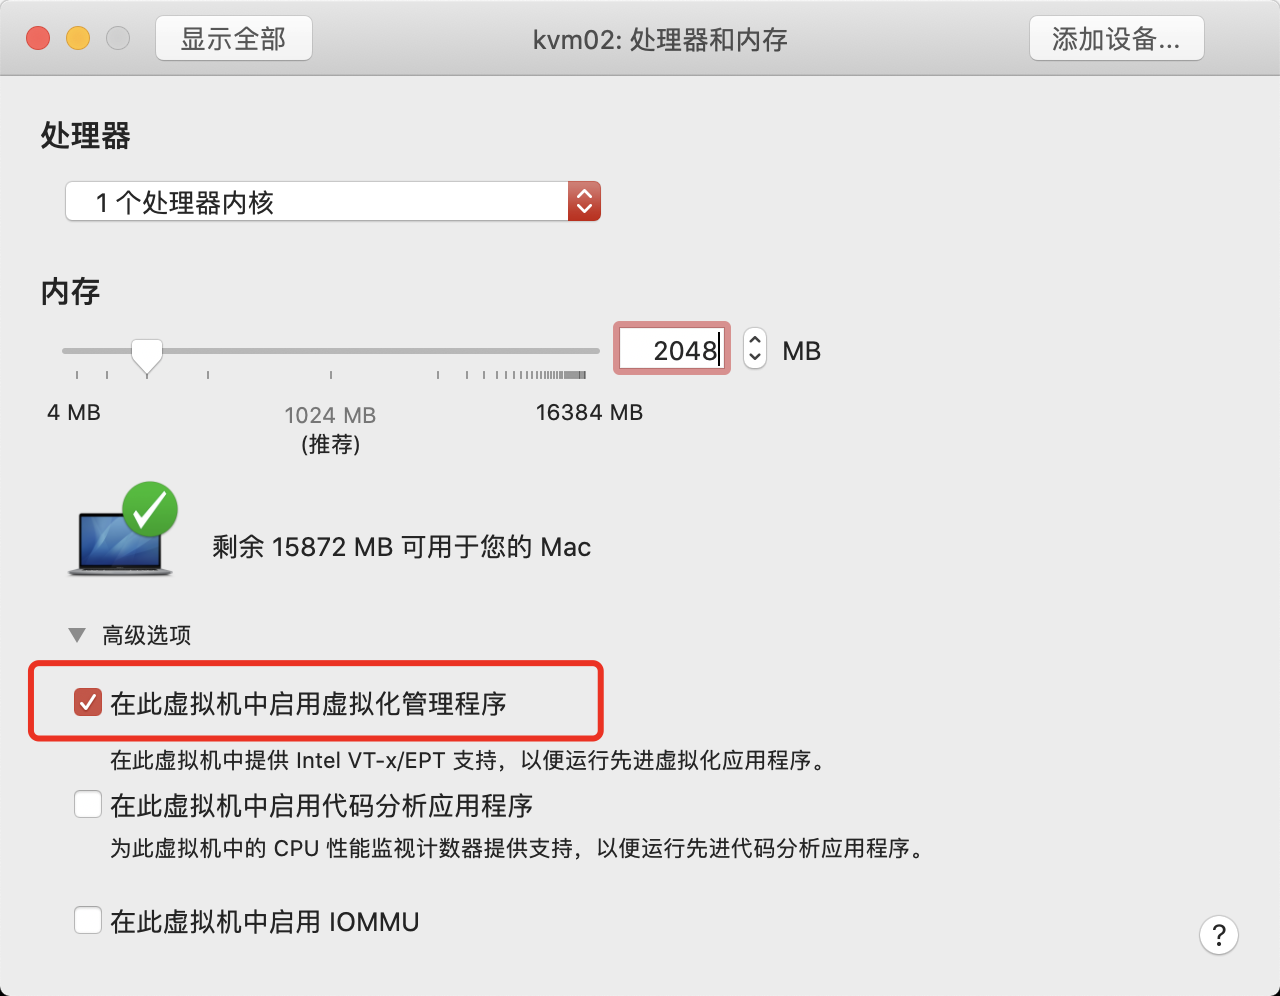
在两台主机安装如下软件包:
$ yum install libvirt virt-install qemu-kvm -y
3、宿主机安装 VNC-Viewer。
4、启动服务:
$ systemctl start libvirtd.service
5、上传一个 CentOS 7 镜像到 kvm01 主机的 /opt 目录下:
# --virt-type kvm    虚拟化的类型(qemu)
# --os-type=linux    系统类型
# --os-variant rhel7 系统版本
# --name centos7     虚拟机的名字
# --memory 1024      虚拟机的内存
# --vcpus 1          虚拟cpu的核数
# --disk /opt/centos7.raw,format=raw,size=10  存储位置及格式
# --cdrom /opt/CentOS-7-x86_64-DVD-1708.iso   镜像位置
# --network network=default   使用默认 NAT 的网络
# --graphics vnc,listen=0.0.0.0 # 宿主机监听地址
# --noautoconsole
$ scp CentOS-7-x86_64-DVD-1804.iso root@10.0.1.11:/opt/
root@10.0.1.11's password:
CentOS-7-x86_64-DVD-1804.iso                  100% 4263MB  67.0MB/s   01:03
安装虚拟机
1、在 kvm01 主机执行下面命令通过上传的镜像安装虚拟机:
$ virt-install --virt-type kvm --os-type=linux --os-variant rhel7 --name centos7 --memory 1024 --vcpus 1 --disk /opt/centos7.raw,format=raw,size=10 --cdrom /opt/CentOS-7-x86_64-DVD-1804.iso --network network=default --graphics vnc,listen=0.0.0.0 --noautoconsole

Starting install...
Allocating 'centos7.raw'                                                                                                                                             |  10 GB  00:00:00
Domain installation still in progress. You can reconnect to
the console to complete the installation process.
2、在宿主机使用 VNC-Viewer 连接 kvm01 主机的 5900 端口:
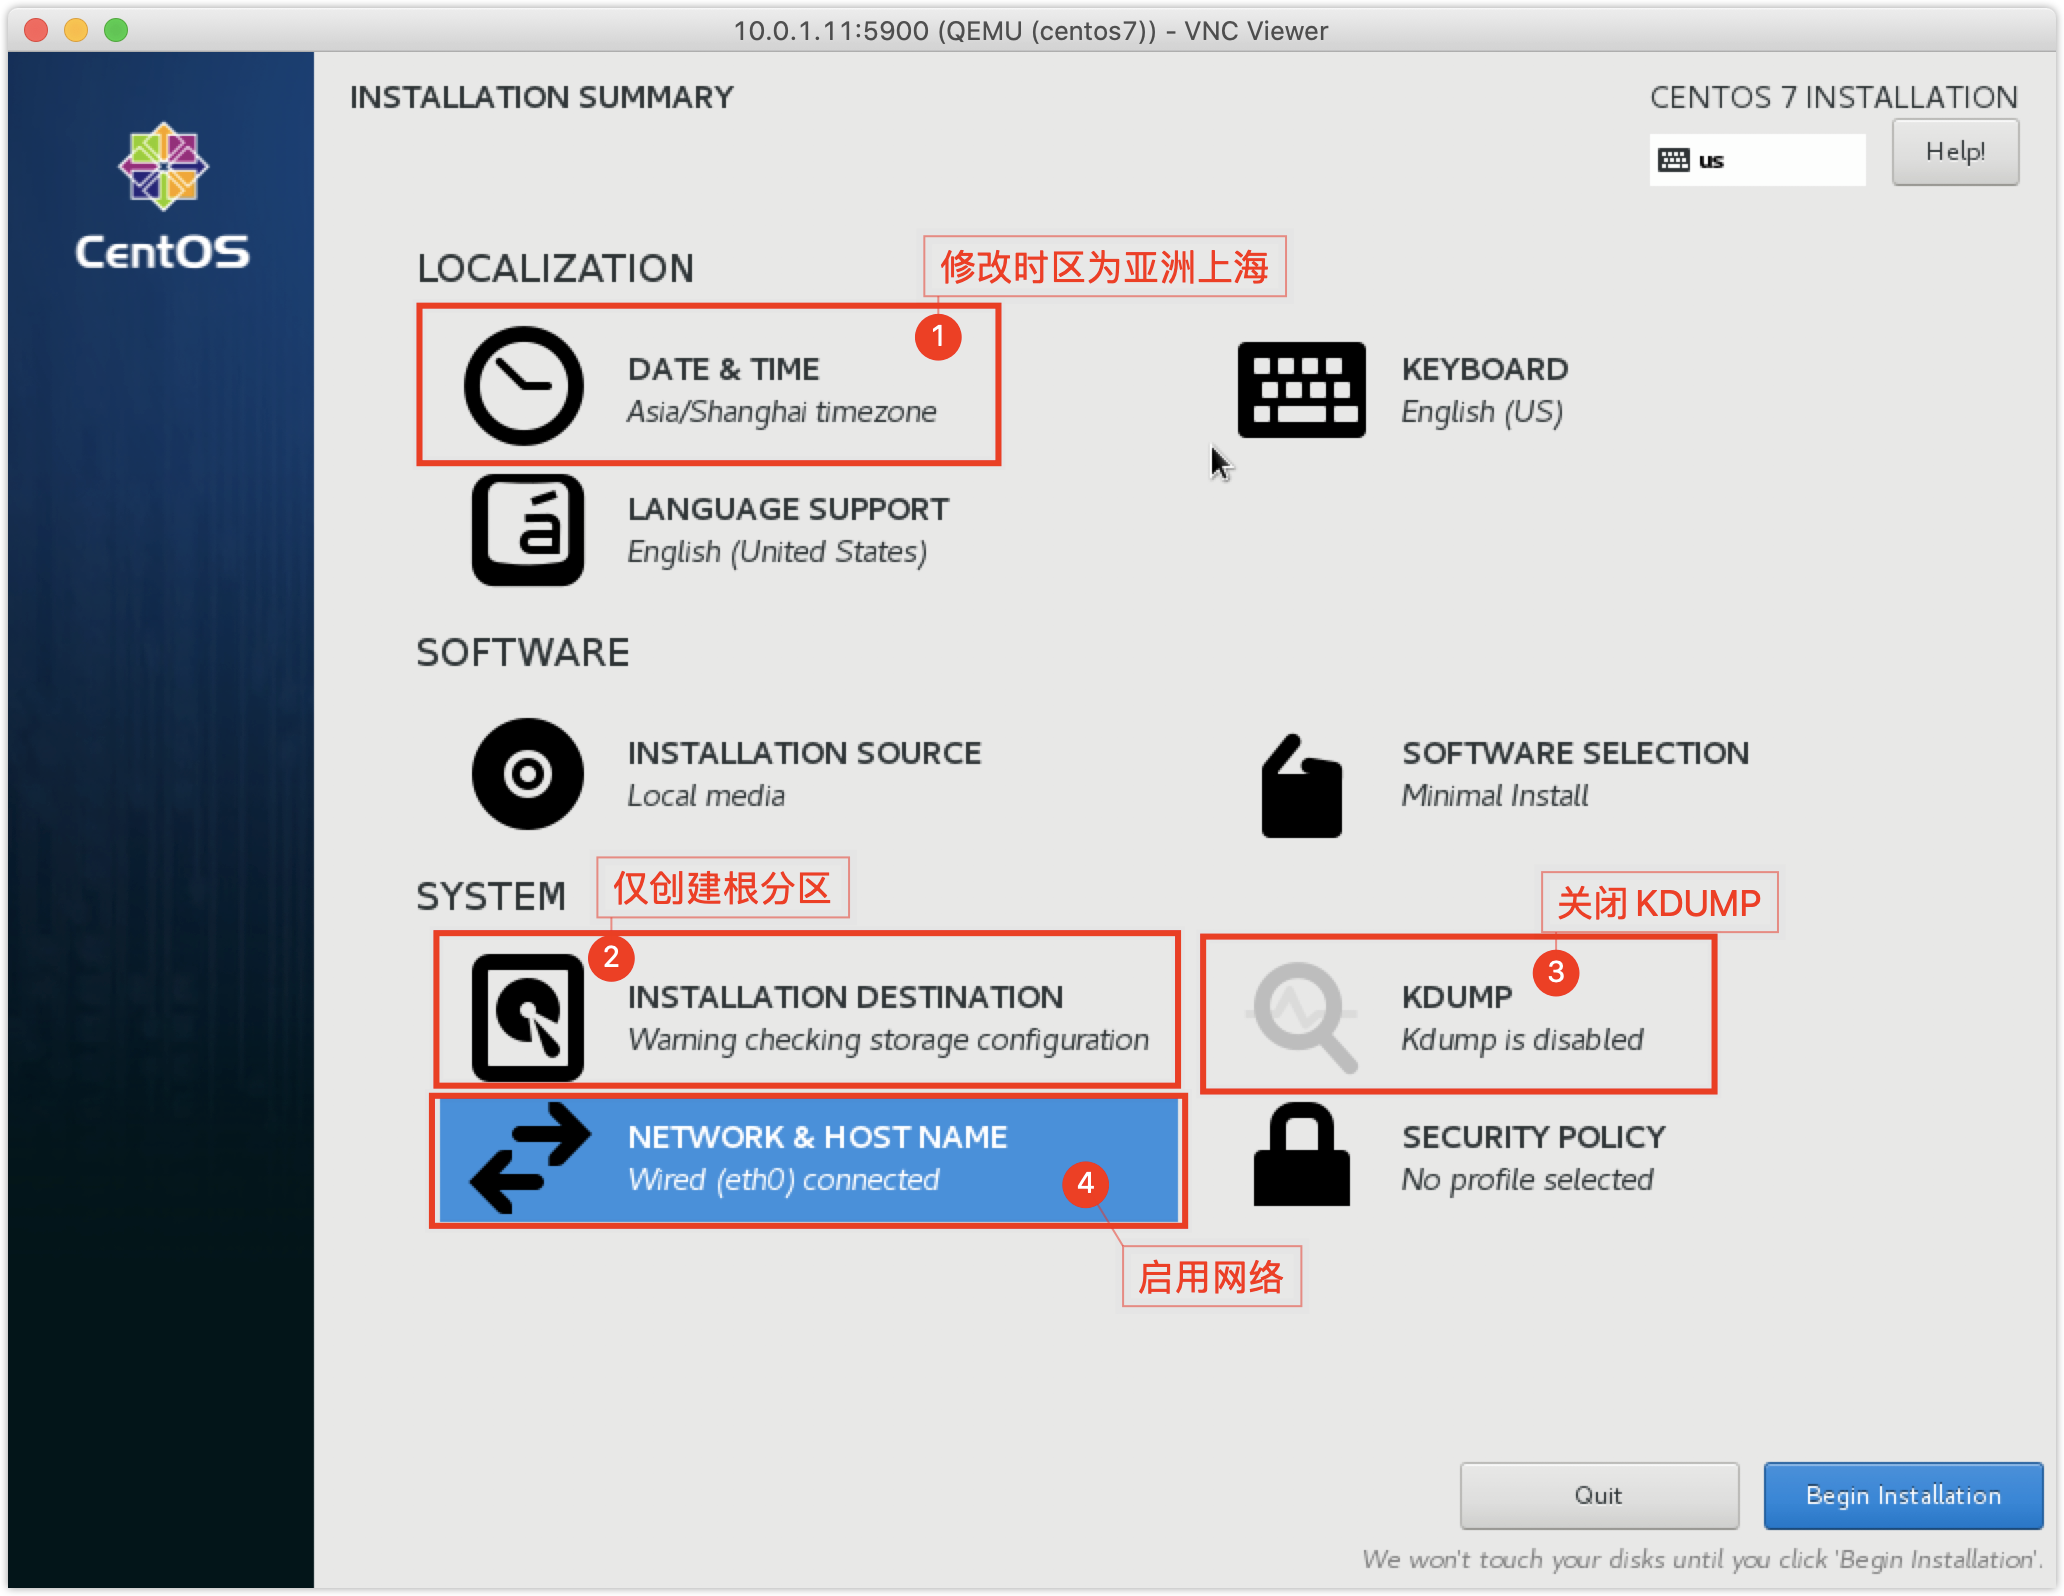
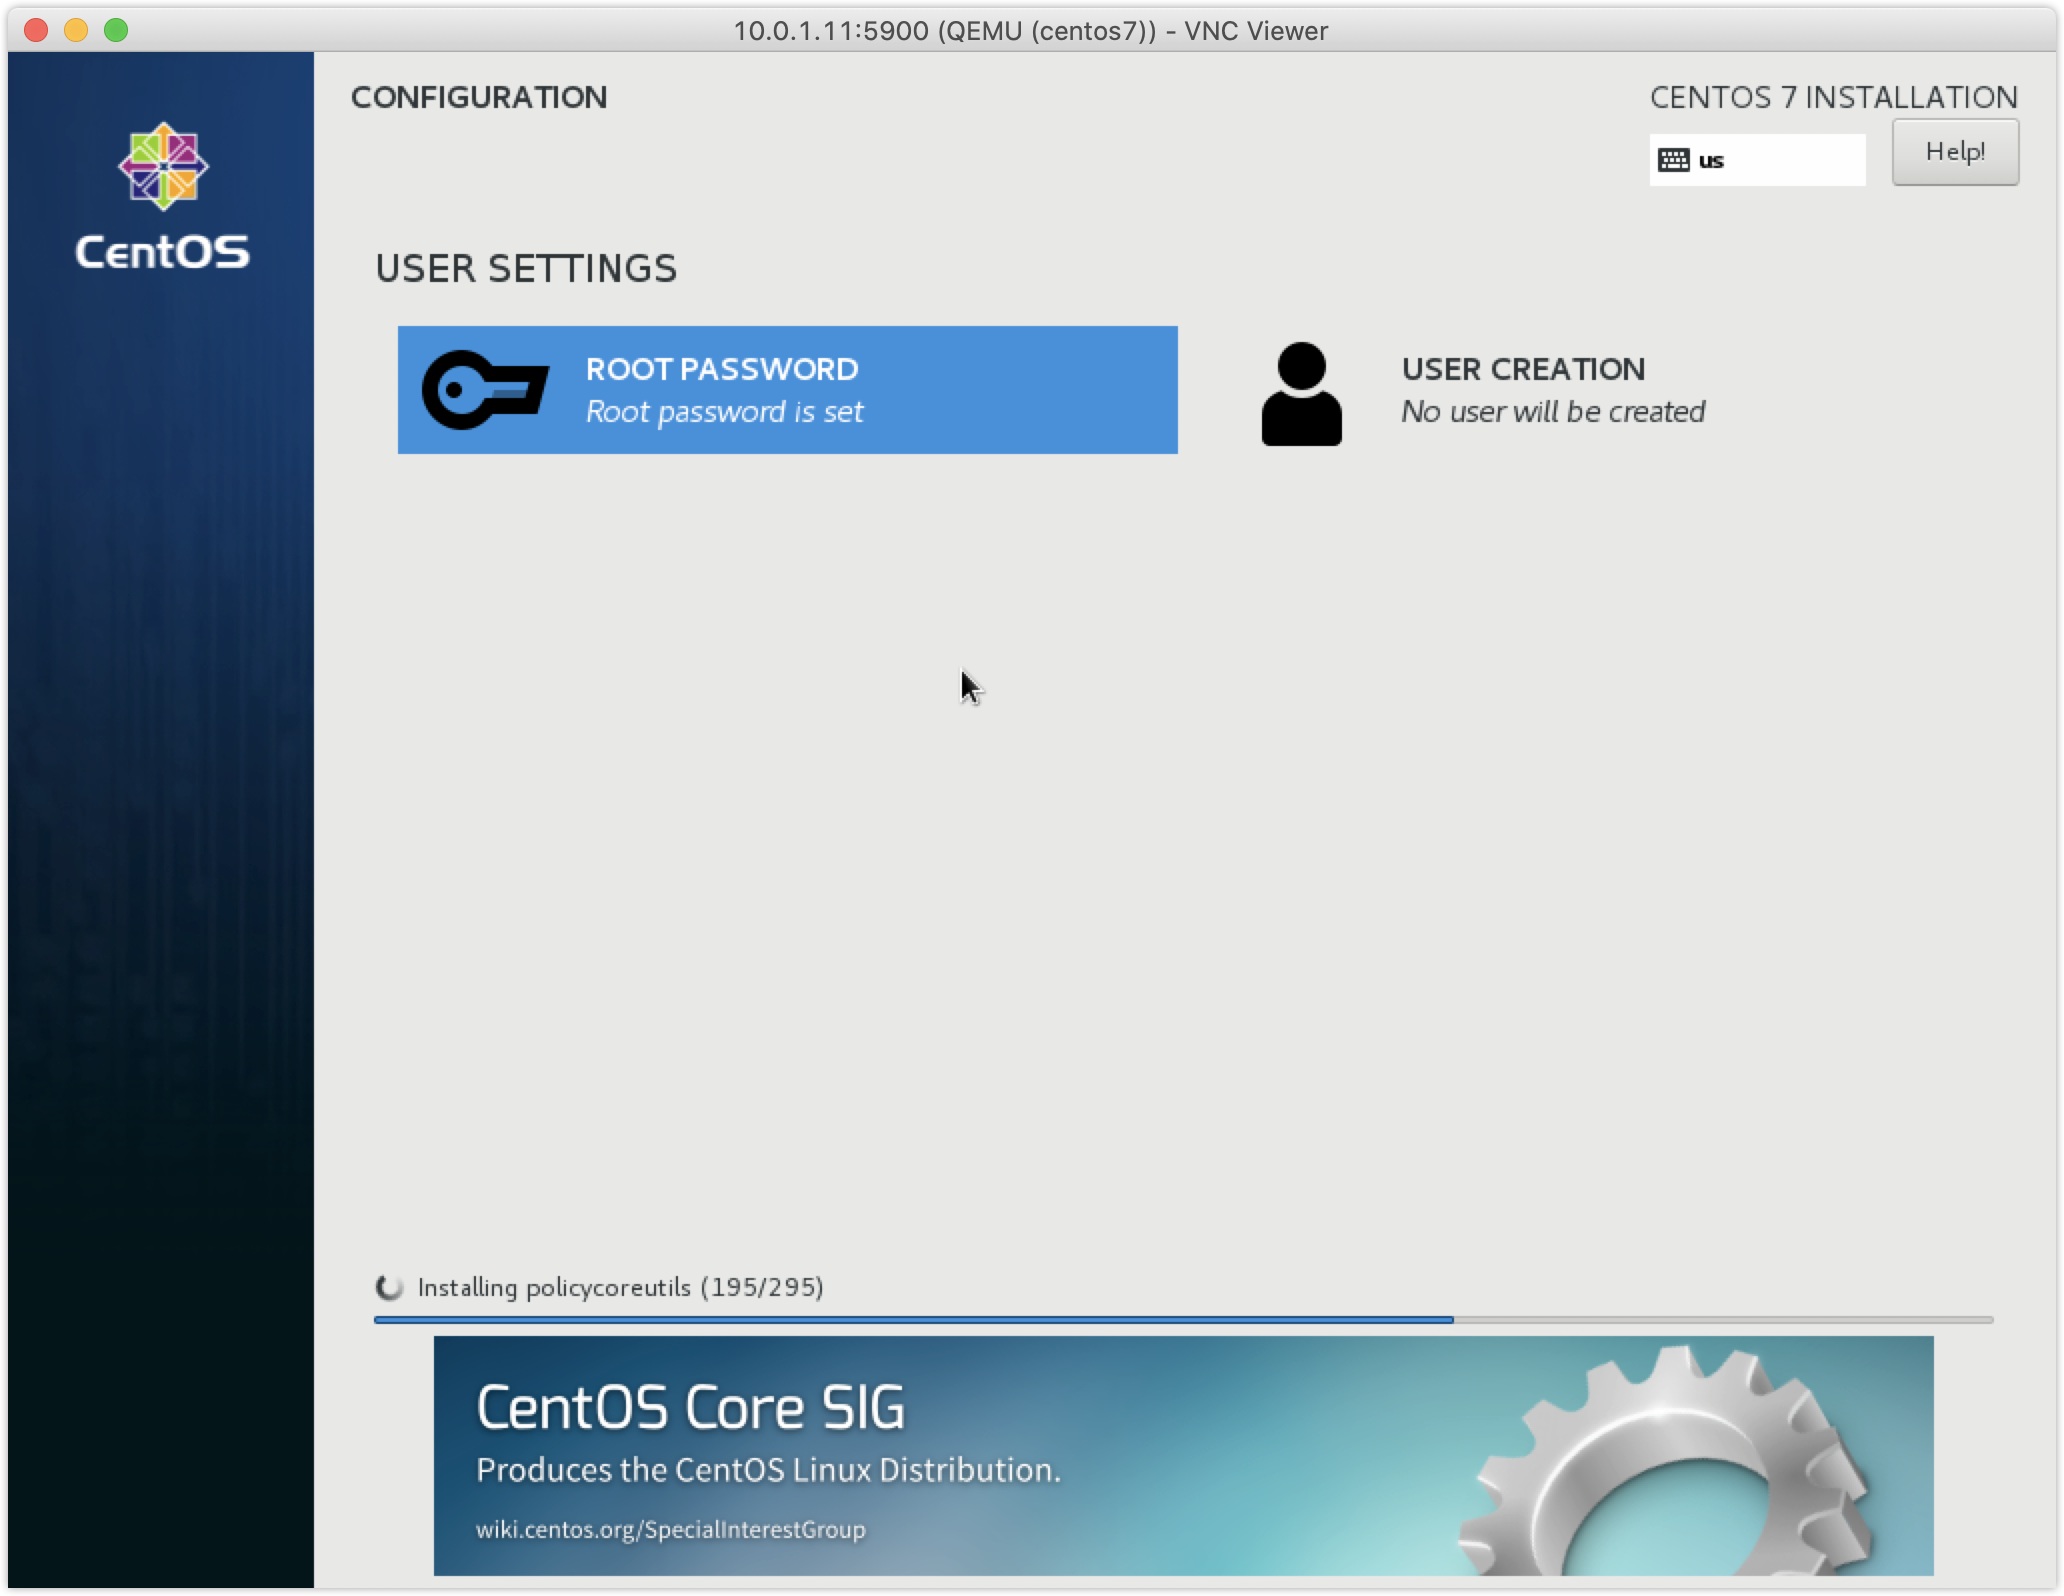
3、执行安装操作:
基本操作
1、查看虚拟机列表:
# 默认 virsh list 仅是查看处于运行状态的虚拟机,--all 可用来查看所有虚拟机
$ virsh list --all
 Id    Name                           State
----------------------------------------------------
 -     centos7                        shut off
2、启动虚拟机:
$ virsh start centos7
Domain centos7 started
3、正常关闭虚拟机:
$ virsh shutdown centos7
Domain centos7 is being shutdown
4、强制关闭虚拟机(相当于拔电源):
$ virsh destroy centos7
5、导出虚拟机的配置信息:
# 默认是标准输出,如果要保存直接重定向到指定文件即可
$ virsh dumpxml centos7 > vm_centos7.xml
6、删除虚拟机:
$ virsh undefine centos7
Domain centos7 has been undefined
7、根据配置文件导入虚拟机:
$ virsh define vm_centos7.xml
Domain centos7 defined from vm_centos7.xml
8、交互式编辑配置文件:
$ virsh edit centos7
...
9、重命名虚拟机:
$ virsh domrename centos7 vm_centos7
Domain successfully renamed
# 建议虚拟磁盘名和虚拟主机名一致,所以这里我修改回去
$ virsh domrename vm_centos7 centos7
10、挂起虚拟机(挂起前虚拟机需要处于开机状态):
$ virsh suspend centos7
Domain centos7 suspended
11、恢复虚拟机:
$ virsh resume centos7
Domain centos7 resumed
12、查看指定虚拟机短格式的端口号:
# 5900 + <短格式端口号> 就是实际占用端口
$ virsh vncdisplay centos7
:0
13、让虚拟机开机自启:
# 首先要保证 libvirtd 服务可以开机自启
$ systemctl enable libvirtd
# 设置指定虚拟机开机自启
$ virsh autostart centos7
Domain centos7 marked as autostarted
14、查看以设定开机自启的虚拟机:
$ virsh list --autostart
 Id    Name                           State
----------------------------------------------------
 5     centos7                        running
15、取消虚拟机的开机自启:
$ virsh autostart --disable centos7
Domain centos7 unmarked as autostarted
16、控制台登录:
要使用 virsh 提供的 console 子命令登录 CentOS 7 虚拟机,需要先使用 VNC Viewer 登录虚拟机修改内核参数:
$ grubby --update-kernel=ALL --args="console=ttyS0,115200n8"

然后执行重启虚拟机,就可以在 kvm01 主机中通过如下方式登录虚拟机:
$ virsh console centos7
Connected to domain centos7
Escape character is ^]

CentOS Linux 7 (Core)
Kernel 3.10.0-862.el7.x86_64 on an x86_64

localhost login:
虚拟磁盘管理
在本示例中,虚拟磁盘文件就保存在 kvm01 主机的 /opt 目录中,如下:
$ ls /opt/
centos7.raw
虚拟磁盘文件有如下两种格式:
- raw: 裸格式,占用空间比较大,不支持快照功能,不方便传输 ,读写性能较好,以 50G 大小的虚拟磁盘为例,如果占用了 5G,那么传输时还是需要传输 50G;
- qcow2:qcow(copy on write)占用空间小,支持快照,性能比 raw 差一点,方便传输,以 50G 大小的虚拟磁盘为例,如果占用了 5G,那么传输时仅需传输 5G 即可;
虚拟磁盘文件格式在安装虚拟机时就可以使用 format 参数指定,如下:
# 指定 raw 格式
$ virt-install --virt-type kvm --os-type=linux --os-variant rhel7 --name centos7 --memory 1024 --vcpus 1 --disk /opt/centos7.raw,format=raw,size=10 --cdrom /opt/CentOS-7-x86_64-DVD-1804.iso --network network=default --graphics vnc,listen=0.0.0.0 --noautoconsole
# 指定 qcow2
$ virt-install --virt-type kvm --os-type=linux --os-variant rhel7 --name centos7 --memory 1024 --vcpus 1 --disk /opt/centos7.qcow2,format=qcow2,size=10 --cdrom /data/CentOS-7.2-x86_64-DVD-1804.iso --network network=default --graphics vnc,listen=0.0.0.0 --noautoconsole
虚拟磁盘的管理需要使用 qume-img 工具,下面演示一下它的常用操作。
1、查看虚拟磁盘信息:
$ qemu-img info centos7.raw
image: centos7.raw
file format: raw
virtual size: 10G (10737418240 bytes)
disk size: 1.3G
2、创建一块 qcow2 格式的虚拟磁盘:
# test.qcow2 是虚拟磁盘文件名,2G 是虚拟磁盘空间大小
$ qemu-img create -f qcow2 test.qcow2 2G
Formatting 'test.qcow2', fmt=qcow2 size=2147483648 encryption=off cluster_size=65536 lazy_refcounts=off
3、调整虚拟磁盘的容量:
# + 表示在原来的基础上增加,直接指定容量则表示扩容到指定的大小
$ qemu-img resize test.qcow2 +2G
Image resized.
4、将 raw 格式虚拟磁盘文件转换为 qcow2 格式:
# 在转换之前建议关闭虚拟机
# 以转换之前创建的 centos7 虚拟磁盘文件为例,-c 选项可启用压缩,要传输虚拟磁盘文件建议开启
$ qemu-img convert -f raw -O qcow2 centos7.raw centos7.qcow2
5、做完磁盘格式转换后,对应虚拟机的配置文件也需要进行修改:
$ virsh edit vm_centos7
...
    <disk type='file' device='disk'>
      <!-- 对 type 和 file 进行修改即可 -->
      <driver name='qemu' type='qcow2'/>
      <source file='/opt/centos7.qcow2'/>
      <target dev='vda' bus='virtio'/>
      <address type='pci' domain='0x0000' bus='0x00' slot='0x06' function='0x0'/>
    </disk>
...
然后虚拟机就可以正常启动了。
快照管理
1、创建快照:
# 为 vm_centos7 创建名为 clean 的快照,对应还有一个 snapshot-create 的子命令,该子命令默认以当前 unix 时间戳作为快照名
$ virsh snapshot-create-as centos7 --name clean
Domain snapshot clean created
2、查看指定虚拟机拥有的快照:
$ virsh snapshot-list centos7
 Name                 Creation Time             State
------------------------------------------------------------
 clean                2020-05-22 20:34:23 +0800 running
3、还原快照:
$ virsh snapshot-revert centos7 --snapshotname clean
4、删除快照:
$ virsh snapshot-delete centos7 --snapshotname clean
注意:
raw的虚拟磁盘文件不支持做快照,qcow2支持快照,并且快照就保存在qcow2的磁盘文件中。
克隆
完整克隆
自动配置
1、自动配置:
$ virt-clone --auto-clone -o centos7 -n web01
2、克隆完毕后就可以查看到克隆后的虚拟机:
$ virsh list --all
 Id    Name                           State
----------------------------------------------------
 -     vm_centos7                     shut off
 -     web01                          shut off
手动配置
1、手动复制源主机的磁盘文件:
$ qemu-img convert -f qcow2 -O qcow2 -c centos7.qcow2 web02.qcow2
2、基于源主机导出配置文件应用于克隆后的主机:
$ virsh dumpxml centos7 > web02.xml
3、修改导出的配置文件:
$ vim web02.xml
# 修改虚拟机的名字
<name>centos7</name>  ->  <name>web02</name>
# 删除虚拟机的 uuid
<uuid>4e99711f-7ca2-4a77-b099-eb207e3f51db</uuid>  ->  删除
# 删除 mac 地址
<mac address='52:54:00:dc:7c:1d'/>  ->  删除
# 修改虚拟磁盘路径
<source file='/opt/centos7.qcow2'/>  ->  <source file='/opt/web02.qcow2'/>
4、根据导出的配置文件导入虚拟机:
$ virsh define web02.xml
Domain web02 defined from web02.xml
5、启动测试:
$ virsh start web02
Domain web02 started
链接克隆
手动配置
1、根据源主机虚拟磁盘文件生成新的虚拟磁盘文件:
$ qemu-img create -f qcow2 -b centos7.qcow2 web03.qcow2
Formatting 'web03.qcow2', fmt=qcow2 size=10737418240 backing_file='centos7.qcow2' encryption=off cluster_size=65536 lazy_refcounts=off
2、基于源主机导出配置文件应用于克隆后的主机:
$ virsh dumpxml centos7 > web03.xml
3、修改导出的配置文件:
$ vim web03.xml
# 修改虚拟机的名字
<name>centos7</name>  ->  <name>web03</name>
# 删除虚拟机的 uuid
<uuid>4e99711f-7ca2-4a77-b099-eb207e3f51db</uuid>  ->  删除
# 删除 mac 地址
<mac address='52:54:00:dc:7c:1d'/>  ->  删除
# 修改虚拟磁盘路径
<source file='/opt/centos7.qcow2'/>  ->  <source file='/opt/web03.qcow2'/>
4、根据导出的配置文件导入虚拟机:
$ virsh define web03.xml
Domain web03 defined from web03.xml
5、启动测试:
$ virsh start web03
Domain web03 started
自动配置
使用如下脚本自动创建虚拟机的链接克隆:
$ cat link_clone.sh
#!/bin/bash
old_vm=$1
new_vm=$2
#a:生成虚拟机磁盘文件
old_disk=`virsh dumpxml $old_vm|grep "<source file"|awk -F"'" '{print $2}'`
disk_tmp=`dirname $old_disk`
qemu-img create -f qcow2 -b $old_disk  ${disk_tmp}/${new_vm}.qcow2
#b:生成虚拟机的配置文件
virsh dumpxml $old_vm >/tmp/${new_vm}.xml
#修改虚拟机的名字
sed -ri "s#(<name>)(.*)(</name>)#\1${new_vm}\3#g" /tmp/${new_vm}.xml
#删除虚拟机uuid
sed -i '/<uuid>/d' /tmp/${new_vm}.xml
#删除mac地址
sed -i '/<mac address/d' /tmp/${new_vm}.xml
#修改磁盘路径
sed -ri "s#(<source file=')(.*)('/>)#\1${disk_tmp}/${new_vm}.qcow2\3#g" /tmp/${new_vm}.xml
#c:导入虚拟机并进行启动测试
virsh define /tmp/${new_vm}.xml
virsh start ${new_vm}
桥接网络
默认的虚拟机网络是 NAT 模式,网段为192.168.122.0/24,仅有 kvm 主机能与其虚拟机通信。
1、在 kvm01 主机中执行如下命令创建桥接网卡:
# 对应可通过 virsh iface-unbridge br0 删除指定网卡
$ virsh iface-bridge eth0 br0
Created bridge br0 with attached device eth0
2、要在 VMWare 开启对应网卡的 DHCP 服务: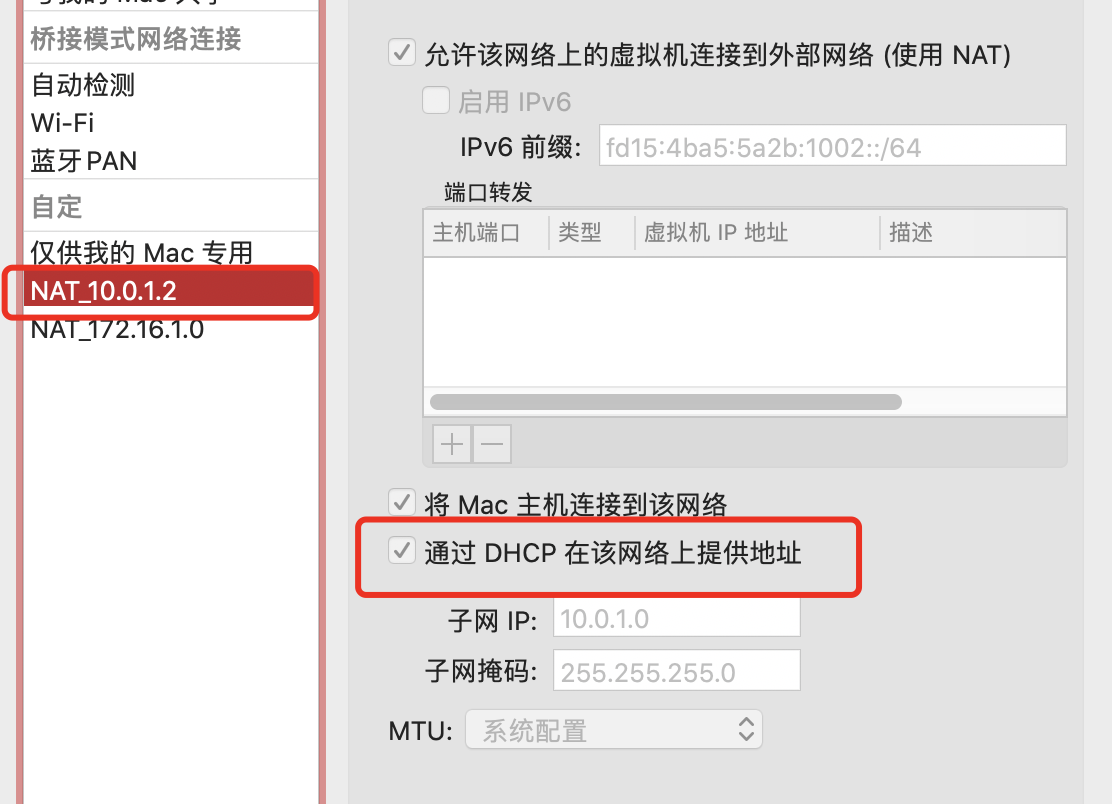
安装时指定
在安装虚拟机时可直接指定使用的网络类型:
# 指定默认 NAT 类型
$ virt-install --virt-type kvm --os-type=linux --os-variant rhel7 --name centos7 --memory 1024 --vcpus 1 --disk /opt/centos7.qcow2 --boot hd --network network=default --graphics vnc,listen=0.0.0.0 --noautoconsole
# 指定桥接网卡
$ virt-install --virt-type kvm --os-type=linux --os-variant rhel7 --name centos7 --memory 1024 --vcpus 1 --disk /data/centos7.qcow2 --boot hd --network bridge=br0 --graphics vnc,listen=0.0.0.0 --noautoconsole
修改已有虚拟机
1、在关机状态下修改虚拟机配置:
$ virsh edit centos7
# 修改接口类型为桥接
<interface type='network'>  ->  <interface type='bridge'>
# 指定桥接网卡
<source network='default'/>  ->  <source bridge='br0'/>
2、启动虚拟机测试网络:
# 可以看到虚拟机网段已经是同 kvm01 主机同一网段
$ virsh console centos7
Connected to domain centos7
Escape character is ^]

CentOS Linux 7 (Core)
Kernel 3.10.0-862.el7.x86_64 on an x86_64

localhost login: root
Password:
Last login: Fri May 22 21:40:03 on ttyS0
[root@localhost ~]# ip a | grep 'inet '
    inet 127.0.0.1/8 scope host lo
    inet 10.0.1.133/24 brd 10.0.1.255 scope global noprefixroute dynamic eth0
热操作
对于下面所有使用
virsh命令进行的热操作都可指定--config命令让其永久生效。
热添加硬盘
添加
1、先创建一块虚拟硬盘:
$ qemu-img create -f qcow2 web01_add.qcow2 5G
Formatting 'web01_add.qcow2', fmt=qcow2 size=5368709120 encryption=off cluster_size=65536 lazy_refcounts=off
2、临时立即生效:
# 所操作的虚拟机需要处于运行状态
$ virsh attach-disk web01 /opt/web01_add.qcow2 vdb --subdriver qcow2
Disk attached successfully
3、永久生效则需要添加 --config 参数,此种方式需要重启生效:
$ virsh attach-disk web01 /opt/web01_add.qcow2 vdb --subdriver qcow2 --config
Disk attached successfully
4、在虚拟机中检查是否识别到新增的硬盘:
$ fdisk -l | grep vdb
Disk /dev/vdb: 5368 MB, 5368709120 bytes, 10485760 sectors
5、临时剥离磁盘:
$ virsh detach-disk web01 vdb
Disk detached successfully
6、永久剥离磁盘:
$ virsh detach-disk web01 vdb --config
Disk detached successfully
扩容
1、给虚拟机添加上面创建的虚拟磁盘:
$ virsh attach-disk web01 /opt/web01_add.qcow2 vdb --subdriver qcow2
2、在虚拟机中格式化并挂载,然后检查容量:
$ virsh console web01
# 格式化
$ mkfs.xfs /dev/vdb
meta-data=/dev/vdb               isize=512    agcount=4, agsize=327680 blks
         =                       sectsz=512   attr=2, projid32bit=1
         =                       crc=1        finobt=0, sparse=0
data     =                       bsize=4096   blocks=1310720, imaxpct=25
         =                       sunit=0      swidth=0 blks
naming   =version 2              bsize=4096   ascii-ci=0 ftype=1
log      =internal log           bsize=4096   blocks=2560, version=2
         =                       sectsz=512   sunit=0 blks, lazy-count=1
realtime =none                   extsz=4096   blocks=0, rtextents=0
# 挂载
$ mount /dev/vdb /mnt
# 检查容量
[root@localhost ~]# df -h | grep /dev/vdb
/dev/vdb        5.0G   33M  5.0G   1% /mnt
3、在虚拟机中卸载新添加的虚拟磁盘:
$ umount /mnt
4、从虚拟机中剥离新添加的硬盘:
$ virsh detach-disk web01 vdb
Disk detached successfully
5、给剥离后的虚拟磁盘扩容然后重新添加到虚拟机中:
$ qemu-img resize web01_add.qcow2 +5G
Image resized.
$ virsh attach-disk web01 /opt/web01_add.qcow2 vdb --subdriver qcow2
6、登入虚拟机检查虚拟磁盘容量:
$ virsh console web01
$ fdisk -l | grep vdb;
Disk /dev/vdb: 10.7 GB, 10737418240 bytes, 20971520 sectors
7、挂载、检查并扩容:
# 挂载
$ mount /dev/vdb /mnt/
# 检查
$ df -h | grep vdb
/dev/vdb        5.0G   33M  5.0G   1% /mnt
# 发现显示还是原来的 5G,此时需要执行下面的命令更新超级块元数据信息
$ xfs_growfs /mnt/
meta-data=/dev/vdb               isize=512    agcount=4, agsize=327680 blks
         =                       sectsz=512   attr=2, projid32bit=1
         =                       crc=1        finobt=0 spinodes=0
data     =                       bsize=4096   blocks=1310720, imaxpct=25
         =                       sunit=0      swidth=0 blks
naming   =version 2              bsize=4096   ascii-ci=0 ftype=1
log      =internal               bsize=4096   blocks=2560, version=2
         =                       sectsz=512   sunit=0 blks, lazy-count=1
realtime =none                   extsz=4096   blocks=0, rtextents=0
data blocks changed from 1310720 to 2621440
# 再次检查会发现扩容成功
$ df -h | grep vdb
/dev/vdb         10G   33M   10G   1% /mnt
热添加网卡
1、热添加一块桥接网卡:
# 如果不指定 --model virtio,那么生成的网卡名是 ensxxx 格式,指定了则是 ethx 的格式
$ virsh attach-interface web01  --type bridge --source br0 --model virtio
2、登入虚拟机检查:
[root@localhost ~]# ip a | grep ': '
1: lo: <LOOPBACK,UP,LOWER_UP> mtu 65536 qdisc noqueue state UNKNOWN group default qlen 1000
2: eth0: <BROADCAST,MULTICAST,UP,LOWER_UP> mtu 1500 qdisc pfifo_fast state UP group default qlen 1000
3: eth1: <BROADCAST,MULTICAST,UP,LOWER_UP> mtu 1500 qdisc pfifo_fast state UP group default qlen 1000
3、热添加一块默认的 NAT 网卡:
$ virsh attach-interface web01 network default
4、登入虚拟机检查:
# 由于上面添加 NAT 网卡时没有指定 --model virtio ,所以生成的第四块网卡名是 ensxx 格式
$ ip a | grep ': '
1: lo: <LOOPBACK,UP,LOWER_UP> mtu 65536 qdisc noqueue state UNKNOWN group default qlen 1000
2: eth0: <BROADCAST,MULTICAST,UP,LOWER_UP> mtu 1500 qdisc pfifo_fast state UP group default qlen 1000
3: eth1: <BROADCAST,MULTICAST,UP,LOWER_UP> mtu 1500 qdisc pfifo_fast state UP group default qlen 1000
4: ens11: <BROADCAST,MULTICAST,UP,LOWER_UP> mtu 1500 qdisc pfifo_fast state UP group default qlen 1000
5、移除指定网卡:
# 移除默认 NAT 网卡,通过指定 MAC 地址标识
$ virsh detach-interface web01 --type network --mac 52:54:00:d3:0c:fc
# 移除桥接网卡,通过指定 MAC 地址标识
$ virsh detach-interface web01 --type bridge --mac 52:54:00:e3:25:69
6、登入虚拟机检查:
$ ip a | grep ': '
1: lo: <LOOPBACK,UP,LOWER_UP> mtu 65536 qdisc noqueue state UNKNOWN group default qlen 1000
2: eth0: <BROADCAST,MULTICAST,UP,LOWER_UP> mtu 1500 qdisc pfifo_fast state UP group default qlen 1000
热添加内存
1、热添加的内存大小是有上限的,这个上限可以在安装虚拟机时指定:
# --memory 512 为当前内存大小,maxmemory=2048 则就是最大上限了,即此时最大热添加内存仅能到 2G
$ virt-install --virt-type kvm --os-type=linux --os-variant rhel7 --name centos7 --memory 512,maxmemory=2048 --vcpus 1 --disk /data/centos7.qcow2 --boot hd --network bridge=br0 --graphics vnc,listen=0.0.0.0 --noautoconsole
2、检查指定虚拟机内存设定:
# 即当前内存大小为 1G,最大上限也是 1G
$ virsh dumpxml web01 | grep memory -i
  <memory unit='KiB'>1048576</memory>
  <currentMemory unit='KiB'>1048576</currentMemory>
3、热调整其内存大小为 512M:
$ virsh setmem web01 512M
4、调整其最大上限然后调整内存大小为 1.5G:
# 需重启生效
$ virsh setmaxmem web01 2G --config
# 重启
$ virsh shutdown web01;virsh start web01
# 检查配置文件
$ virsh dumpxml web01 | grep memory -i
  <memory unit='KiB'>2097152</memory>
  <currentMemory unit='KiB'>2097152</currentMemory>
# 调整内存大小
$ virsh setmem web01 1536M
热添加 CPU
1、可在安装虚拟机时直接指定 CPU 的颗数,如下:
# --vcpus 1,maxvcpus=10 指的是默认 CPU 颗数为 1,可调整最大颗数为 10
$ virt-install --virt-type kvm --os-type=linux --os-variant rhel7 --name centos7 --memory 512,maxmemory=2048 --vcpus 1,maxvcpus=10 --disk /opt/centos7.qcow2 --boot hd --network bridge=br0 --graphics vnc,listen=0.0.0.0 --noautoconsole
2、调整虚拟机 CPU 的最大颗数:
$ virsh setvcpus web01  --maximum 4 --config
# 重启生效
$ virsh shutdown web01; virsh start web01;
3、热添加 CPU 颗数:
$ virsh setvcpus web01 4
4、登入虚拟机检查:
$  lscpu | head
Architecture:          x86_64
CPU op-mode(s):        32-bit, 64-bit
Byte Order:            Little Endian
CPU(s):                4
On-line CPU(s) list:   0-3
Thread(s) per core:    1
Core(s) per socket:    1
Socket(s):             4
NUMA node(s):          1
Vendor ID:             GenuineIntel
热迁移
1、在 kvm01 主机启用 nfs 服务共享磁盘文件,实际使用 nfs 服务可以单独放在一台主机上:
$ yum install nfs-utils rpcbind -y
$ cat /etc/exports
/data  10.0.1.0/24(rw,async,no_root_squash,no_all_squash)
$ mkdir /data/ && systemctl start rpcbind nfs
# 将目前的虚拟磁盘文件迁移到 nfs 中
$ mv /opt/* /data/
2、kvm01 和 kvm02 主机都挂载 nfs 到同一个目录:
$ mount -t nfs 10.0.1.11:/data /opt
3、迁移之前必须保证两台 kvm 主机能够通过主机名互相通信,在它们的 /etc/hosts 文件中添加如下内容:
10.0.1.11 kvm01
10.0.1.12 kvm02
、在 kvm01 主机执行下面命令临时迁移到 kvm02 主机:
# 热迁移的主机必须是启动状态,即 web01 在 kvm01 中必须是启动状态
# 由于 web01 依赖于桥接网卡,所以迁移之前需要在 kvm02 中执行 virsh iface-bridge eth0 br0 创建 br0 网卡
$ virsh migrate --live --verbose web01 qemu+ssh://10.0.1.12/system --unsafe
root@10.0.1.12's password:
Migration: [100 %]
5、在 kvm02 主机检查运行的主机:
# 会发现原本在 kvm01 中运行的虚拟机正常迁移到 kvm02 主机运行了
$ virsh list
 Id    Name                           State
----------------------------------------------------
 7     web01                          running
6、上述方式是临时迁移,如果在 kvm02 主机停止迁移过来的虚拟机,该虚拟机也会消失不见,如下:
$ virsh shutdown web01
Domain web01 is being shutdown

$ virsh list --all
 Id    Name                           State
----------------------------------------------------
7、如果希望执行的是永久迁移操作,则可使用下面命令:
# --persistent 表示永久迁移,--undefinesource 标识在源主机删除迁移的虚拟主机
$ virsh migrate --live --verbose web01 qemu+ssh://10.0.1.12/system --unsafe --persistent --undefinesource
root@10.0.1.12's password:
Migration: [100 %]
8、此时 kvm02 即便停止了 web01,也依旧能在虚拟机列表查看到该主机,如下:
$ virsh shutdown web01
Domain web01 is being shutdown

$ virsh list --all
 Id    Name                           State
----------------------------------------------------
 -     web01                          shut off